Guest Post: Holy Manicures

Hi everyone! While I take the night off after an oh-so-lovely root canal, I've asked one of my new favorite bloggers to do a guest post here at Nailed It. I'd like to introduce to those of you who don't know her already, Margaret from Holy Manicures!

I've been admiring her manicures every since I stumbled across one of her posts. Her style is much like I consider mine to be: bright and unafraid of color and bold patterns. She impresses me more and more each day and is definitely one to follow if you haven't already done so.

Let's take a look at her manicure.


When Katy asked me to do a guest post, I was excited to do my first guest post for another blog, and started thinking of manicure ideas. I decided that a neon manicure was the perfect choice now that it really is feeling like summer, and went for a simple and fun paint splatter design.


I used the paint splatters as a sort of twist on a french manicure on all of my nails except the accent nail, which I covered in the splatters. The base color for this design was Wet n Wild French White Creme and I used four of my favorite neon polishes for the splatters. The ones I chose to use were Claire's Orange Neon, American Apparel Neon Yellow, China Glaze Shocking Pink, and China Glaze In The Lime Light.

This design can be really fun in all sorts of color combinations, but the neons are definitely my favorite option. So perfectly bright for summer!


Eh? What'd I tell ya?! Brilliant stuff right?! Here are a few of my other favorite bright manicures she has done.

From: http://holymanicures.blogspot.com/2012/05/beachy-crab-nails.html
From: http://holymanicures.blogspot.com/2012/04/funky-eighties-nails.html
From: http://holymanicures.blogspot.com/2012/04/fun-leopard-nails.html
From: http://holymanicures.blogspot.com/2012/03/twister-nails.html
Her range isn't just bright and colorful, but those are my favorites. I'm a sucker for color.

I hope you've enjoyed this awesome mani from Margaret. You can visit her blog, Holy Manicures and pick your favorite mani as well!

OPI Flowers


Simple design tonight featuring a killer yellow from OPI. The yellow is aptly called The "It" Color. Ugh I love it! It's like the color of the Simpsons.

The design was just a simple freehand design using another OPI, Get In The Expresso Lane. I didn't really use OPI that much because the selection of colors I have from OPI aren't nearly as vast as my China Glaze colors. Now that I've found a cheap retailer for OPI here near Boulder, I may need another Helmer just to fit them all in! This can't be good...

Leopard Pistol Accent

 
I've been wanting to recreate this manicure since I first saw it at Marta's blog, ChitChatNails. Her manicure used different fingers for the leopard accent, as you can see here. I wanted to do my first two fingers as the accent nails, and I decided to start calling this type of pointer/thumb accent combo a pistol accent. Pretend like you're shooting a handgun. Which two fingers did you use? See...pistol accent!


The bright red I used is another score from the ridiculously cheap beauty supply store a reader pointed out to me near Boulder. It's Tasmanian Devil Made Me Do It (OPI). It's soooo bright and I'm thrilled it's part of my collection. I have one other red that comes close, but it's not bright with that orange-red feel.

The base for the accent nails is Farah (Zoya). I used the m57 Konad stamp rather than freehanding the leopard spots. They're filled in with Load (Illamasqua) and stamped with Black Creme (Wet n' Wild). I literally can't stop looking at my hands.

Thanks for the inspiration Marta!!!

Palette-Cleansing Classic French

After a week of glitter and the perils that come with removing it, I wanted to keep my nails relatively clean, with a bit more of a polished look than they appear au naturel. I decided to do a classic French manicure for this reason, but also because I wanted to show that french tips aren't necessarily tacky if done right, or at least with some forethought.


I saw a post on RedditLaqueristas (a Reddit subreddit which I loyally follow) about how french tips are sometimes considered tacky (here). I wanted to do a French manicure the moment I read all of this. I'm please with the way it makes my nails look, and I'll tell you why. The lines mimic my natural nail lines almost exactly. If I had kept going down toward the cuticle with the white tips, it would start to look unnatural. Here's how you should look at a French manicure. If your nails aren't as white as you'd like them to be, use the white tip to cover it up, but stop once you reach the natural white line on your nail. This means that a French manicure may not look good on your nails. When I had short, nail-bitten nails, I would glop on a lot of white, in the hopes it would make my nails look good, but it never really did. Just as wearing heels that are too high will actually make your legs look shorter and wider, overdoing the white polish line will make your nails look the same.

I used two layers of You Callin' me a Lyre? (OPI) to start. I picked up this along with six other OPI colors from a discount beauty supply store one of my readers tipped me off to. It was like a candy store for nail polish. After those coats dried, I added two thin layers of Marshmallow (Essie). Both of these polishes are very sheer, and require lots of coats to reach the opacity of your typical creme. This is exactly why I chose these shades. They blend better with my nails' natural color and the line of Marshmallow doesn't appear as harsh. To top it all off, I added one last layer of You Callin' Me a Lyre?. That really blended everything perfectly and I may just leave this on longer than a day!

Glitter and Nail Art: Day 7

Here's the last post in my glitter and nail art week. If you're looking for some kind of inspiration and motivation to challenge yourself and your nail blog, consider doing a week of glitter and nail art. It gives you enough wiggle room to keep your manicures simple, but still requires that you do more than just layer some glitter over your regular polish. It forces you to think outside the box and is challenging enough to stick with without feeling obligated.


For my final design, I wanted to showcase the glitter mainly, so I did a glitter gradient. The glitter is Clockwork from Sonoma Nail Art. I scored this one during her last sale, in addition to Pinot Envy. I have shown you the two others I have here and here. I piled Clockwork on at the base of my nails over Rising Star (OPI), which I painted over Posh (Revlon). I love Posh and I'm glad I bought it.

I hope you've enjoyed glitter and nail art week at Nailed It as much as I have! Keep an eye on those Etsy stores as some restock constantly, some randomly, and some at a very specific time which they will tell you outright if you ask or check their info sections.


Glitter and Nail Art: Day 6

Dummy! Who does a holographic nail art design but doesn't take pictures until it's too dark!?


Sorry Mercury Twilight, I didn't do you any justice in these shots.

In lieu of the amazing shots of this polish I'm sure I'll be able to grab and update with tomorrow, here is a sunny picture of my last manicure with my favorite flower, the pansy.


I apologize for the small post, but I'm heading out the door and I don't have much time after the hike that brought that pretty flower out.

You'll notice there isn't much to the nail art today. Well, again, not much time. The polish I used is another F4 Polish polish called Stormy Night. I should've worn it two nights ago, when it really was stormy.

I'll get better pictures of the holographic and glitter mix tomorrow when (and if) there's sun. Have an awesome night!

Edit: Here is an updated sun picture. THERE'S THAT HOLOGRAPHIC!

Glitter and Nail Art: Day 5

Is it really day five of this Nailed It installment already? Boy how time flies when you're nails constantly sparkle!


Speaking of sparkle, check out this glitter! Black Tie Affair is from F4 Polish, which I have been absolutely loving lately. All the polishes I bought from these ladies are the perfect consistency when it comes to glitters. Not too chunky, but you don't have to fish around to fill your brush.

I didn't get enough neon yesterday, so I really brought it out today with four China Glazes: Flip Flop Fantasy, Sun Worshiper, Happy Go Lucky, and Electric Pineapple. The middle finger uses the same colors over White On (Sally Hansen Xtreme Wear), done freehand with my nail art brushes.

Drink it in! I'll wait while you go buy everything you see here, because I know you're drooling as much as I am.

Glitter and Nail Art: Day 4

I needed more neon in my life, especially after looking at American Apparel's mix of promos for their neon line. I've shown you Floam and Orange You Unique? already though. I want to share with you my find from GlitterFest Nail Polish, Water Wings.


It's made up of neon green, blue and purple glitter pieces. The blue pieces provide the most sparkle, but I bought this polish for the matte green neon glitter. Can you see it very well? Here's another picture showing it a bit more up close.


Just another glitter shop to keep a watchful eye on. I may have to tell Siri to remind me to check for restocks a few times a day.

I just used my striping brushes dipped in Lickety-Split Lime (Sally Hansen Insta-Dri) and Fan the Flames Fuchsia (Sation) to create the stripes.

Glitter and Nail Art: Day 3


Do you know how hard it is covering up even just a tiny bit of today's glitter? It literally pained me to apply any strokes of a different color to Sneeze Breeze, a sick blue glitter from TheHungryAsian. That also may have been from the recent increase in weights during YPump, but let's attribute it to the gorgeous polish shall we? After all, this is Nailed It, not Wailed It.

I thought it appropriate to add roses to Sneeze Breeze. It's Attack of the Cottonwoods out here in Boulder, as day after day, little soft fluffy cotton drifts breeze around town. It's beautiful, especially at night when cars' headlights capture them moving across the surface of the roads, but I'd be lying if I said I wasn't constantly pumped full of allergy medicine. Stupid gorgeous nature!

The roses were done with Hot Like Lava (Color Club), White On (Sally Hansen Xtreme Wear), Be My Valentine (Sinful Colors), Green (Color Madric), and a hint of Me First (Sinful Colors). Whew! 

I layered Sneeze Breeze over Swimsuit...Nailed It! (OPI) because I didn't want to waste any of it. They actually appear quite close in color at first glance, but the OPI doesn't pack the neon punch like Sneeze Breeze. I don't know where Kae (TheHungryAsian's shop owner) found the blue glitter used in this, but it's a mind-melter. Is it neon? Is it shimmering? Is there more than one color of blue in there? I wish I had these answers, but alas, my glitter envy stops at buying polishes, not making them.

Glitter and Nail Art: Day 2

DAY 2! I'm pissed about today. Things did not go according to plan, but this will have to suffice as it's getting late and I don't have time to repolish, rephotograph, and repost a new one. It's passable, but definitely not my best work. I blame it on the rattling motorcycle I was riding around earlier. I'm an excellent back seat accessory to a motorcycle, let me tell you.


I love the polish that was used today. It's called Pirate's Booty and it's from Polish Rehab (Facebook and Etsy). Hayley has crafted some great glitter collections since the conception of her store, and I was pleased as pickles to be in the know early on so I could grab the glitters before their popularity took off. It since has, as you can see by the lack of product currently for sale, and for good reason.

It's a bit hard to make out over Hey Sailor (China Glaze), but there are red glitter pieces in addition to the black and gold. Baby squares, big squares, and hexagonal shapes are all found in this polish.

Again, I apologize for the bumpy appearance this manicure is giving off. I used the tape method, but unfortunately, letting the glitter layers dry before adding another doesn't work well with taping. It'll just goo-out on you, and you'll be peeling off a filmy layer of polish with the tape.

Oh well, lesson learned!


Glitter and Nail Art: Day 1

For the next week, I'm going to put together a series of designs that feature some of the absolutely amazing glitters from Etsy I've been accumulating for the past month or so. I'm really excited about it, and I know you will be too.

I didn't want to just do swatches of glitter, so, like today, I'll add some funky nail art to accompany the glitter and make it much more interesting.


Today was inspired by Hey, Nice Nails! awesome design. She has been doing a lot of stuff I am in love with lately, and these bows keep making appearances. The best part is they're incredibly simple to make! I did mine with White On (Sally Hansen Xtreme Wear), Pool Party (China Glaze) and Black Creme (Wet n' Wild). It's so fun!

The featured glitter is from F4 Polish, and it's called Pink Penguin. I'm sure there's some clever joke about what is black, white and pink all over, but I don't have it. It's everything I like in a glitter...and by everything I like I mean it has black or white matte glitter.

Weekend Water Marble

Well...I finally did it. I wasn't sure if I was ready to commit to something so major, but I decided it was time to finally take the plunge. After 24 years, I finally...water marbled.


I used colors from my favorite China Glaze collection, Up and Away: Four Leaf Clover, Happy Go Lucky, and Heli-Yum. It was a pretty easy selection, and they go really well together.

I used cutepolish's tutorial and it worked wonderfully. Her tips about blowing on the surface of the water and the way she twisted her toothpick to pick up the dried polish on the surface of the water were really clever.

I also learned that you need to be careful about where you place your design. I drew designs in different places on the cup, depending on which hand was going to be dipped. Then I wouldn't have to twist my hand into uncomfortable positions to properly dip the nail in the design.

One additional tip I have to offer is to combine the use of tape and Vaseline. I've heard of people using both techniques separately, but I figured...

¿Porque no las dos?
So I taped off my fingers, then, using a cotton swab dipped in Vaseline, I coated the areas of skin that were still exposed like the part under my nail and the two corners of my exposed cuticle near the base of my nail. Worked like a charm!

Cleanup was much simpler than I thought it would be, and I partially contribute that to my color choices. Black water marbling would probably be a royal pain, but yellow, pink, and teal are much easier. I mainly contribute it to the Vaseline-tape combo I used.

I love that endearing little spot on my middle finger. I'll name it Spot.

Optical Chaos

I haven't stamped all my nails in a while! Trying to decide between designs today, I finally decided it was time for some stamping, using the Love at First Lavender I showcased earlier in my review of Sation polishes.


The plate is Red Angel RA-106 and I just used Black Creme from Wet n' Wild for the stamping. My middle finger got a little smudgy, so I apologize for that. Isn't it just optically chaotic though? There's just so much going on, but there's only two colors. Crazy!

Minty Cookie Nails

Are you dieting? Are sweets tempting you to no end? Do you find yourself standing in the sweets aisle at the grocery store just to absorb the joy the sweets once brought you? If you answered yes to any of these questions, then this manicure is for you.


These tempting talons feature Mint Chocolate Chip from F4 Polish. If that ice cream colored mint pastel doesn't get your stomach growling, then feast your eyes on Sand Tropez (Essie) and Nomadic Nude (Color Club), decadently topped with lovely chips of Get in the Expresso Lane (OPI). Are you drooling yet?

Please wear responsibly. Nail biting is highly likely under such delicious nail art circumstances.

Absolutely Floral

Ever since Kayla announced that she was doing a nail art contest with a floral theme, I've been trying to decide what type of design to do. Do I want pastel colors? Muted colors? Neons? My inspiration came from an unused make up carrier sitting on the bottom shelf of our closet. I walk by it every day, but it took slamming my toe into it earlier tonight to strike the right chord. No lightbulbs came on, but the throbbing pain in my pinky toe was enough to knock some sense into me and mimic the damn design. Stupid sharp pointy box. You'll see a peak of that behind my nails.


I won't even bother with the colors for this manicure as they're quite extensive and nothing out of the ordinary. Everything is done with nail polish though, no acrylic paints for this one. The sparkle background you may find interesting though. That's Chunky Holo Purple (Kleancolor), though I really could've used any of the Chunky Holos since they all appear exactly the same over black.

Cross your fingers this enough to win me the prize over at Nails by Kayla Shevonne. (I won't be begging for your votes for this one, it's judged by Kayla and her crew of judges.)

Teal Binge

You all are so supportive. I blogged yesterday about a nail art design I quickly hated. I've heard some very kind words from my readers regarding that manicure that I wasn't expecting. I honestly thought, and still do think, that was one of my least favorite posted manicures.

I wasn't fishing (or is it phishing?) for compliments or support, just stating a fact, and I received all well-wishes and happiness from some admirers of the design. So thanks for that unexpected pick-me-up.


You're now looking at a scalloped funky french. It's very frilly, but the color adds a definite sexitude to it. Black and any pastel screams negligee, even if it's simple. The black tips are done with Black Creme (Wet n' Wild) with a dotting tool. Swimming beneath is Mermaid's Tears (OPI) and Nostalgic (L.A. Girl). I can't resist a glitter.

I have a ton of glitters I would love to put over some polishes. I may have plans for that...

Boho Birdie

Quick reminder to vote for my submission one last time! Today's the last day.

Today's manicure drove me nuts. I should've left the gradient alone. Personally, I think the stamp ruined it. But it also may have been a case of the it-looked-better-in-real-lifesies. I hate it when I catch those.


The gradient was created with two Color Club colors: New Bohemian and Earthy Angel. Turns out, Earthy Angel is not a good color for my skin tone. Probably will just stick that one in the pile with other accents-only polishes.

I sponged to get the gradient effect, then stamped the feather from the Bundle Monster BM-15 plate with Konad Special Brown polish.

Damn...it looked so much better in my head. As soon as these pictures were done being taken, I cleaned it all off.

Yodel Layla Yodel Lay

Wearing a true holographic polish really makes me want to yodel. Or try something else as equally ridiculous for me to attempt. Trying my hand at brain surgery after reading up on the Wiki pages? Hog-tie a darting calf in a crowded three ring circus? Acting as a Sherpa to climbers of a snowy mountain?

If you answered yes to that last one, then you would probably be using the term "Sherpa" incorrectly. Sherpa correctly refers to an ethnic group from the most mountainous region of Nepal. The people from these Himalayan regions are "highly regarded as elite mountaineers and experts in their local terrain"1. Not every "guide" on a mountaineering excursion is a Sherpa. It's a very small portion of guides, and only those from this region.


It's thought that "a portion of the Sherpas' climbing ability is the result of a genetic adaptation to living in high altitudes. Some of these adaptations include unique hemoglobin-binding enzymes, doubled nitric oxide production, hearts that can utilize glucose, and lungs with an increased efficiency in low oxygen conditions."2

If you answered yes to any of the other ones, you know me well.

So here's a true holographic...the yodel-inducing formula.


Jade Groove (Layla) and Connect the Dots (Lynderella).

Pull Over Farah

I would absolutely love it if you took a second to vote for my submission to the Bundle Monster nail art contest! Thank you!

Onto the aaaaaaart (said in a deep, low, drawling voice, swirling a glass of wine or brandy, nose straight up in the air).

I wanted to use my dotting tools again. I love those guys.


The colors I used were Farah (Zoya), Cote D'Azur (Icing), and Pull Over (Sinful Colors). Ok, odd coincidence. As I typed that, an ambulance drove by outside somewhere, and the sirens echoed right into the windows. Cosmic voices from the nailiverse have spoken!

If you're around a Claire's, or a Claire's Club, or an Icing store, I recommend stopping in. While the formulas on the polishes are a bit lackluster, the colors actually are quite eye-catching. Plus, they're pretty cheap, and it's fun to relive your little girlhood with the goodies they have there. I went for the sole purpose of picking up Candy Shop, but wound up with four bottles of colors I was really quite excited about. It's worth the trip!

Different Strokes

Gotta post before midnight strikes and it's a technical missed day of nail art!


I used True Blue (Claire's) and Neon Yellow (Savina) for the majority of this. And who's that? Oh, it's Floam (Nail-Venturous Lacquers). Hard work pays off. I've been trying to score that for a while, and my patience paid off.

Totally inspired by PSHIIIT.

PS: Don't forget to vote for my submission!

Miss Professional Nail Sation Polish Review

I've got some YUMMY swatches today!


Have you ever heard of Sation polish? It's the signature brand of Miss Professional Nail. They recently re-branded and completely modernized the brand, making it more modern with a custom-made bottle and brush. Both of these revamped features were wonderful to work with. The shape of the bottle fits well in a Helmer. Comparable in height to China Glaze bottles (slightly bigger) but less wide, it's a pretty perfect shape. The bottle isn't a perfect circle, which lends itself well to stuck caps that need a strong grip to untwist.

The brush's bristles were all very even on the bottles I was sent, and the shape was great. I had no problems with application that came from the brush.

All the polishes I'm going to show you are formaldehyde, DBP & toluene-free, available at Miss Professional Nail for $5.

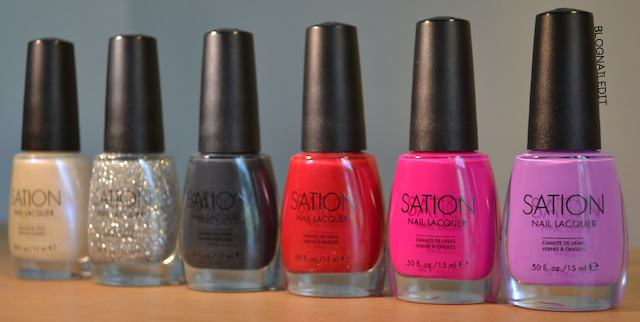
First, let's look at three polishes from their new limited summer collection, California Gleamin', which you can buy soon this week over at Miss Professional Nail. (I was most excited about these colors.)

Love at First Lavender

Love at First Lavender

This is Love at First Lavender. Yep, we started with a bang. A bang of a ridiculously bright, ridiculous addicting lavender shade. What you're seeing is color-accurate. It really does come across that bright on your nail, and it really is that stunning. I loved the formula for this one, and it took two very effortless coats to reach 100% opacity.

Next is Fan the Flames Fuchsia.

Fan the Flames Fuchsia

Fan the Flames Fuchsia

Another eye-catching shade, Fan the Flames Fuchsia applied flawlessly as well in two coats. These were my two favorites in the bunch because I'm a huge sucker for creme polishes. I bet if you saw this on a stranger's nails, you'd either stop to ask them what it was and where to get it, or you'd do the secret "I hate that girl" thing all girls inevitably do to girls they're feeling a little jealousy towards.

The last polish from California Gleamin' doesn't fall in the same realm as the previous two, so I'm curious to see what the rest of the line holds that would tie this in.

Seriously Slate

Seriously Slate

This is Seriously Slate. Not a creme like the other two, and much less easy to work with. It's one of those streaky polishes that takes three careful coats to reach the level of opacity and become even on the nail. Once it's there though, it's pretty great. You can see the little pieces of shimmer in the gun-metal grey. Those make it special and help save it from the poor formula.

The next two polishes can both be purchased from Miss right now. First up, Strawberries.

Strawberries

Strawberries

This one pleases me greatly. It's so bright, and has more hints of orange than some other reds, which I prefer. It's perfectly named too. The color reminds me of the leftover strawberry juice that winds up all over your hands when you're cutting up strawberries. Like Seriously Slate, there are little flecks of shimmer, which you can see a bit better below.


It didn't apply as opaquely as Fan the Flames Fuchsia or Love at First Lavender, but in two coats it was perfect. I think this may be considered a jelly, but I'm still a bit confused about the lingo behind different polish formulas. This is a great color and formula though, and I'm please it's part of my collection now. My ever-growing, ever over-flowing collection.

The last solo polish I'll show you today is Electrical Storm, a tricky girl.

Electrical Storm

I say Electrical Storm was tricky because it's a very thin, pearly iridescent that's a damn chameleon. (That's a good thing.) It needs lots of coats (4-5) to reach a good level, but even then it's certainly not opaque. That's okay though. You shouldn't buy an iridescent like this expecting it to be an opaque polish. It's meant to give your nail more life, and I like it best worn the way I have here. You can still see my nail line underneath, but the pearl color distracts enough from that, also magically elongating my nails somehow. Maybe that's just white shades that do that for me. 

The chameleon polish changes in whichever light it's in, sometimes going a little green, sometimes a little blue, but predominantly purple, as you can see in my shot. Careful with this one, it takes a while to dry, even with a quick-dry topcoat.

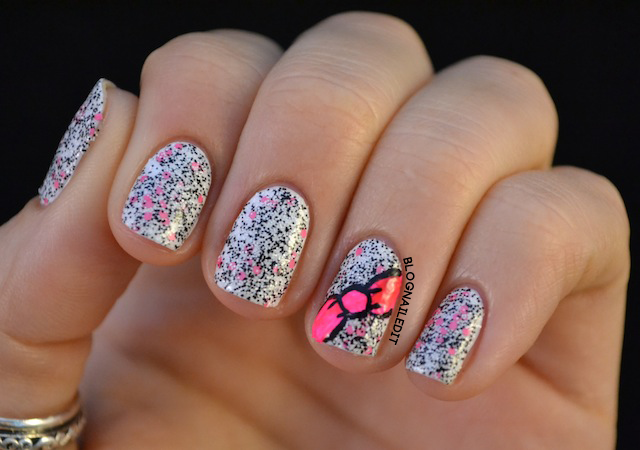
Were you counting? If so, you'll notice there's an extra bottle in the top picture I haven't gotten to yet. (Or you just saw the glitter and asked yourself "WHERE IS THAT ONE?!") Hold tight, because this one's a crowd pleaser.

Silver Glitter is the last in the bunch of polishes I was sent, and I thought it best to show it to you over the other 5 colors you've already seen. Each of these swatches is one layer on top of the other colors.

Silver Glitter over Electrical Storm

Silver Glitter over Love at First Lavender

 Silver Glitter over Fan the Flames Fuchsia

Silver Glitter over Strawberries

 Silver Glitter over Seriously Slate

So good right? Overall I'm thrilled with these polishes. I love that they're cheap, you can get them online, and their formulas are mostly easy to work with. I can't wait until they release the full lineup for California Gleamin'. If the colors are as eye-poppingly lovely as Love at First Lavender and Fan the Flames Fuchsia, they'll be big hits in my book.

These products were sent to me by Miss Professional Nail. The reviews are based entirely on my experience with the products and were in no way influenced by anyone.